 Save
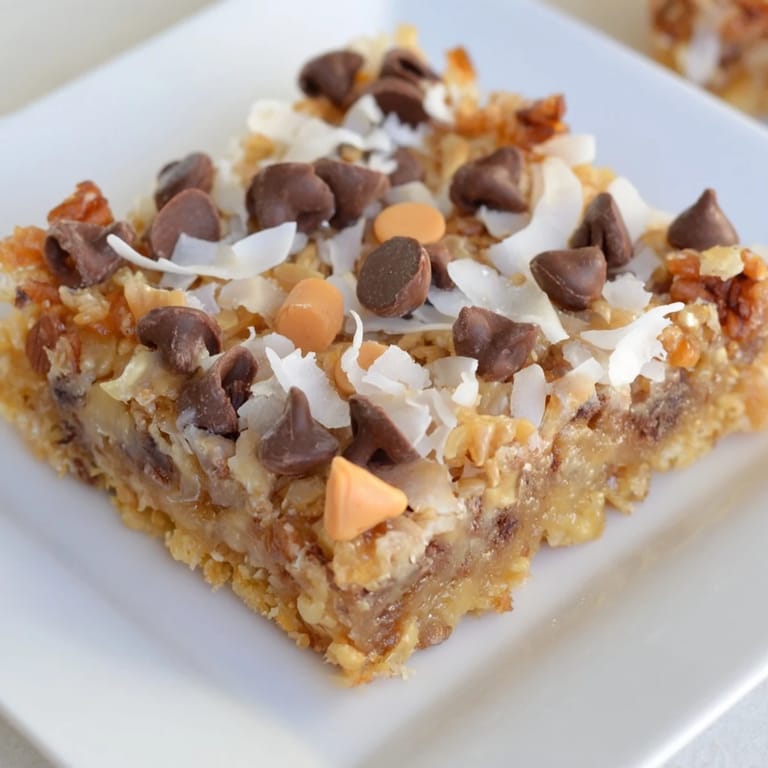
Save My roommate called these "Magic" Cookie Bars because watching them transform in the oven felt like actual kitchen sorcery. One afternoon, we had graham crackers, some random bag of chocolate chips, and a can of sweetened condensed milk, and somehow those simple layers became the most requested dessert at every gathering after that. The magic is real—it's in how the condensed milk seeps down and binds everything together while baking, creating this impossible texture that's chewy, crunchy, and decadent all at once.
I made these for a bake sale once and didn't expect them to sell out before the brownies. Someone came back an hour later asking if I had extras, and that's when I realized these weren't just good—they were the kind of dessert that people actually remember. My neighbor has been asking for the recipe ever since, and I finally stopped holding it as a secret weapon.
Ingredients
- Graham cracker crumbs: The foundation that holds everything together; crushing them fine ensures an even, compact crust that won't crumble when you bite.
- Unsalted butter, melted: Toss this with the crumbs to create a buttery base—melted makes it way easier to distribute evenly.
- Sweetened condensed milk: This is the secret binding agent that keeps everything chewy and moist; don't skip the pour-over step.
- Semi-sweet chocolate chips: Use real chocolate chips, not melts, for better texture and flavor.
- Butterscotch chips: Optional but worth it for depth; white chocolate works if you want to go sweeter.
- Shredded coconut: Sweetened coconut adds chewiness and tropical notes; toasted coconut takes it even further if you want to toast it first.
- Pecans or walnuts: The crunch factor that keeps things interesting; chop them roughly so you get big pieces.
Tired of Takeout? 🥡
Get 10 meals you can make faster than delivery arrives. Seriously.
One email. No spam. Unsubscribe anytime.
Instructions
- Set your stage:
- Preheat to 350°F and line your 9x13 pan with parchment—this makes cleanup effortless and prevents sticking. A lightly greased pan works too, but parchment is the move.
- Build the crust:
- Combine graham cracker crumbs with melted butter until it resembles wet sand, then press it firmly and evenly into the bottom of your pan. Take a moment to make sure it's compact; a flat spatula edge works perfectly for this.
- The condensed milk layer:
- Pour the entire can over the crust in a slow, steady stream, letting it settle and seep down naturally. You'll watch it create this glossy layer that looks like caramel.
- Build your tower:
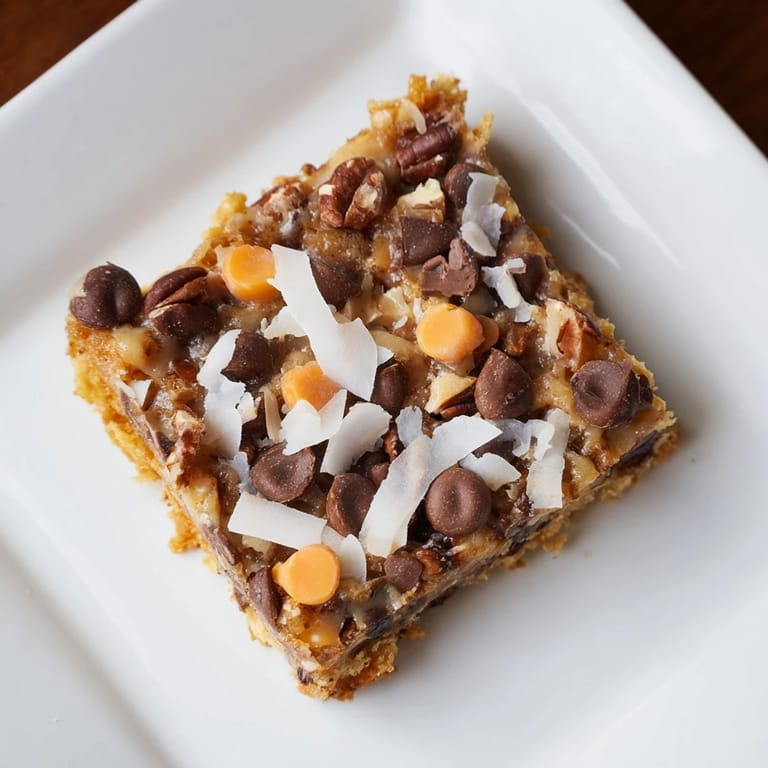
- Scatter chocolate chips first, then butterscotch, then coconut, then nuts, creating layers without mixing them together. The order doesn't matter for flavor, but it looks beautiful this way.
- Gentle compression:
- Use the back of a spatula to press everything down softly—you want it compact enough to hold together but not crushed. This helps the layers meld during baking.
- Bake with patience:
- Twenty-five to thirty minutes until the edges turn golden and the center feels set when you touch it gently. The edges will brown faster, so watch for that as your signal.
- Cool completely:
- This is crucial; rushing to cut them warm means they fall apart. Let them sit at room temperature for at least an hour, then cut into 16 bars with a sharp knife.
 Save
Save These bars have shown up at potlucks, office parties, and family dinners, and they always disappear first. There's something about a homemade dessert that comes together this easily that makes people feel genuinely cared for, even though you barely spent any time in the kitchen.
Customizing Your Layers
The beauty of magic cookie bars is how forgiving they are to substitution. Swap butterscotch for white chocolate, use almonds instead of pecans, or go half dark chocolate and half milk chocolate—the condensed milk and crust stay constant, so the structure never fails. I've made versions with dried cranberries, macadamia nuts, and even dark chocolate with sea salt, and each one tasted like it was meant to be that way from the start.
Storing and Gifting
Keep these in an airtight container at room temperature for up to five days, though they rarely last that long in my house. If you want to drizzle them with extra melted chocolate after they've cooled, that's when they feel like a real gift—the lines of chocolate on top make them look like you fussed over them way more than you actually did.
Why These Work Every Time
The condensed milk is doing the heavy lifting here, acting as both sweetener and moisture that keeps everything bound together and chewy. The graham cracker crust provides structure and a subtle salty counterpoint to all that sweetness, while the mix of textures keeps each bite interesting. Once you understand how these elements work together, you can trust the process and focus on the joy of watching your oven do the final magic.
- Let them cool completely before cutting; warm bars crumble, but cool bars slice like butter.
- Use parchment paper for easy removal and zero cleanup regret.
- Double-check that your oven is actually at 350°F with an oven thermometer if you have one—ovens lie sometimes.
 Save
Save These bars remind me why simple recipes are sometimes the best ones—no complicated technique, no fussy timing, just honest ingredients layered with care. Once you make them once, you'll understand why they earned the name.
Recipe Questions & Answers
- → What type of nuts are best for these bars?
Pecans or walnuts add a nice crunch and complement the sweetness, but almonds work well as a substitute.
- → Can I use a different crust base?
Graham cracker crumbs are traditional and offer great flavor, but crushed digestive biscuits can be used for a similar texture.
- → How do I know when the bars are done baking?
Edges should be golden brown and the center set but slightly soft to touch, indicating a chewy texture.
- → Is it necessary to press the layers before baking?
Gently pressing the layers ensures they compact well, helping the bars hold together after baking.
- → How should these bars be stored?
Keep them in an airtight container at room temperature for up to 5 days to maintain freshness and texture.